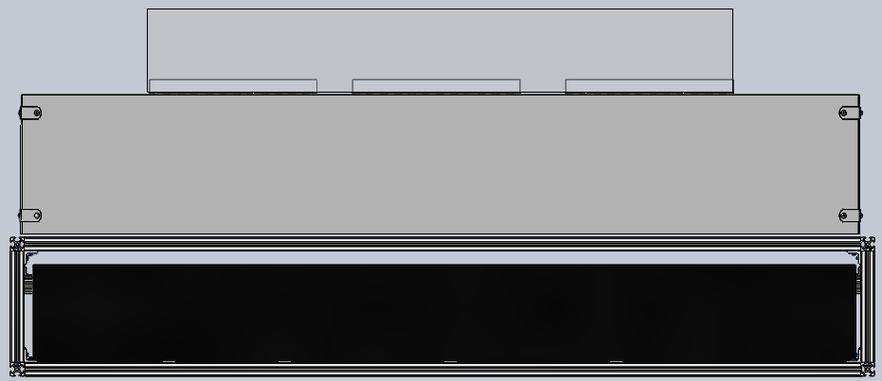
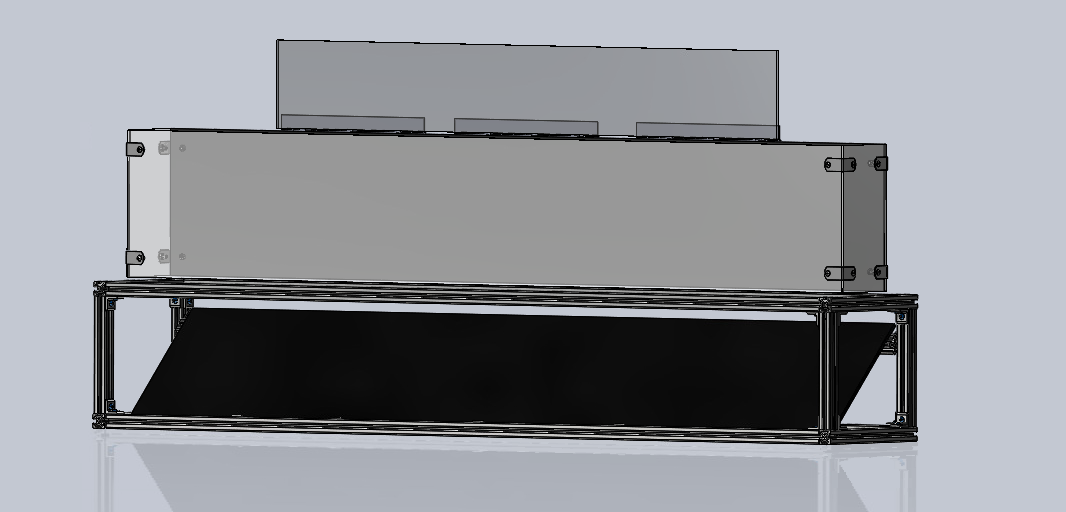
Spatiotemporal Arena Building Instructions
|
Required Materials
Arena Structure
|
Animal Enclosure
*One 60" sheet and the 42" sheet must be the desired color to provide contrast with your animals. Acrylic may be ordered in the desired color, or can be covered with colored adhesive vinyl.
|
Drawings and Models
Drawing 1: 62’’ x 10’’ x 0.25’’ acrylic sheet for top of arena structure
*recommend use of 64" length sheet, rather than the 62" length drawing provided from a previous iteration; instructions here are provided to accommodate at 64" long acrylic panel
*recommend use of 64" length sheet, rather than the 62" length drawing provided from a previous iteration; instructions here are provided to accommodate at 64" long acrylic panel
| spatiotemporal_only_arena_structure_acrylic_drawing.slddrw |
Drawing 2: 60’’ x 10’’ x 0.125’’ acrylic sheet for animal enclosure
| 60x10_animal_enclosure_acrylic_drawing.slddrw |
Drawing 3: 5’’ x 10’’ x 0.125’’ acrylic sheet for animal enclosure
| 5x10_animal_enclosure_acrylic_drawing.slddrw |
3D model of spatiotemporal only arena
| spatiotemporal_arena.sldasm |
Arena Structure
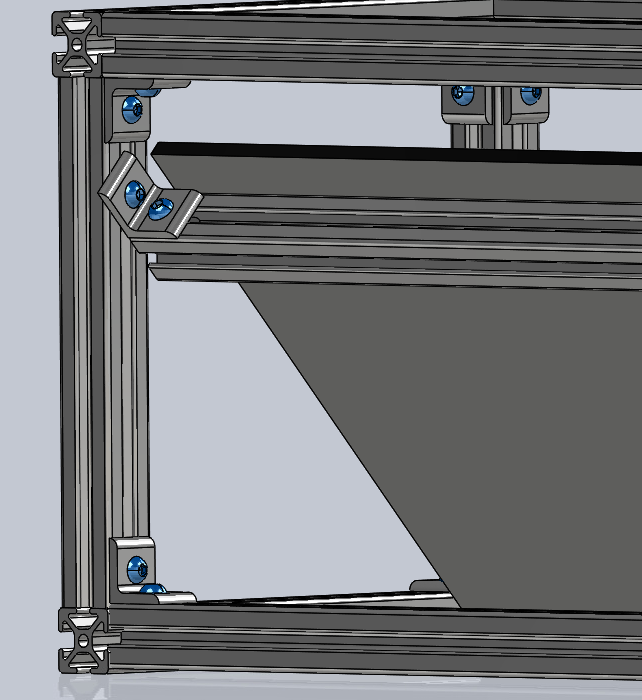
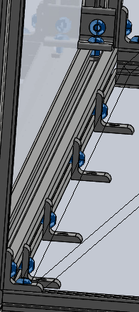
1. Take one 62’’ 80/20 bar and evenly space out and attach four 80/20 brackets into one channel using the t-nuts and button head cap screws.
1. Take one 62’’ 80/20 bar and evenly space out and attach four 80/20 brackets into one channel using the t-nuts and button head cap screws.
- This bar will serve as the bottom-front bar of the arena structure
- Brackets should face inside the arena structure
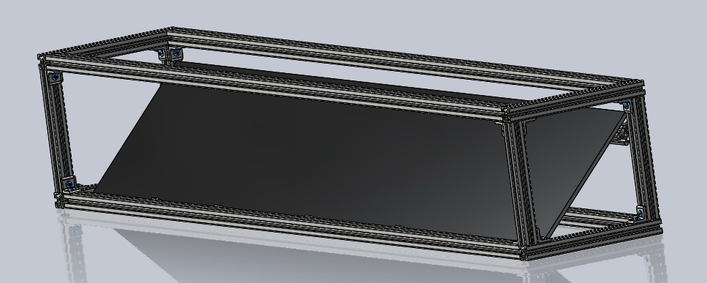
2. Assemble the bottom base of the arena structure using:
3. Construct the sides of the arena using:
4. Prepare the 80/20 bar that will support the top edge of the mirror by placing one 80/20 bracket assembly on each side of a 62’’ 80/20 bar.
5. Attach the 62'' 80/20 bar to the back of the 10'' 80/20 bars.
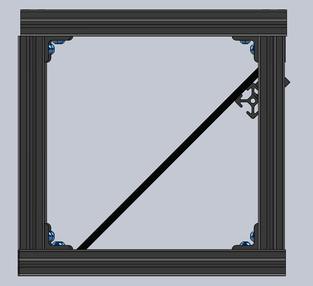
6. Place the mirror inside the arena so it rests on the 62’’ 80/20 bar and the brackets on the bottom-front 80/20 bar of the arena (from Step 1).
7. Adjust the height of the 62’’ 80/20 bar so the mirror lies at a 45˚ angle.
8. Construct the top of the arena structure using:
- The bar from Step 1
- Another 62’’ 80/20 bar
- 2 – 8’’ 80/20 bars
- 80/20 brackets, screws, and t-nuts
- Tip: When assembling arena structure, it will be easiest to prepare the bracket with the screws and t-nuts loosely, slide the bracket into an 80/20 channel, and tighten it after positioning the bracket correctly.
3. Construct the sides of the arena using:
- 2 – 8’’ 80/20 bars for the width of the arena
- 4 – 10’’ 80/20 bars for the height of the arena
- 80/20 brackets, screws, and t-nuts
4. Prepare the 80/20 bar that will support the top edge of the mirror by placing one 80/20 bracket assembly on each side of a 62’’ 80/20 bar.
5. Attach the 62'' 80/20 bar to the back of the 10'' 80/20 bars.
6. Place the mirror inside the arena so it rests on the 62’’ 80/20 bar and the brackets on the bottom-front 80/20 bar of the arena (from Step 1).
7. Adjust the height of the 62’’ 80/20 bar so the mirror lies at a 45˚ angle.
8. Construct the top of the arena structure using:
- 2 – 62’’ bars for the length of the structure
- 2 – 8’’ bars for the width of the structure
- 80/20 brackets, screws, and t-nuts
9. Construct the top of the arena structure using:
10. Drill four holes into the 64’’ x 10’’ x 0.25’’ acrylic sheet as specified in Drawing 1, and attach this sheet to the top of the arena structure using the 80/20 socket head cap screws and t-nuts.
11. Place the arena structure on a study table. You may want to clamp the structure to the table for extra security.
- 2 – 62’’ bars for the length of the structure
- 2 – 8’’ bars for the width of the structure
- 80/20 brackets, screws, and t-nuts
10. Drill four holes into the 64’’ x 10’’ x 0.25’’ acrylic sheet as specified in Drawing 1, and attach this sheet to the top of the arena structure using the 80/20 socket head cap screws and t-nuts.
11. Place the arena structure on a study table. You may want to clamp the structure to the table for extra security.
Optional: Lighting Structure
It is useful to build an additional 80/20 frame to hold arena lighting in a consistent position. In our arena, we have used 80/20 to create a frame that fixes to the far supports of the arena structure, protrudes from the front of the arena, and is supported by 80/20 bars running from the floor to above the full height of our arena. 40" LED light bars are fixed to the crossbeams of this lighting frame. To achieve desirable light color and diffusion across the arena, we have fitted our light bars with amber lens covers and white photography diffusion fabric.
We have not provided specific instructions on the construction of a lighting structure, as this will depend on your selected light fixtures and power sources, the total height of your arena from the floor (if placed on a table), and other spatial constraints of your testing space. On the "EDGAR" page, you can find images of the arena fitted with our current lighting structure setup.
It should be noted that, whatever your lighting solution, you should seek to achieve uniform, bright lighting across the full length of your arena without obstructing either the ventral or lateral views on camera. Furthermore, care should be taken to adjust lighting to achieve bright lighting without over-saturating and washing out images , as clear contrast between your animals' paws and their fur (and their fur from the background of the arena) will be critical features for quality data processing with GAITOR software.
Animal Enclosure
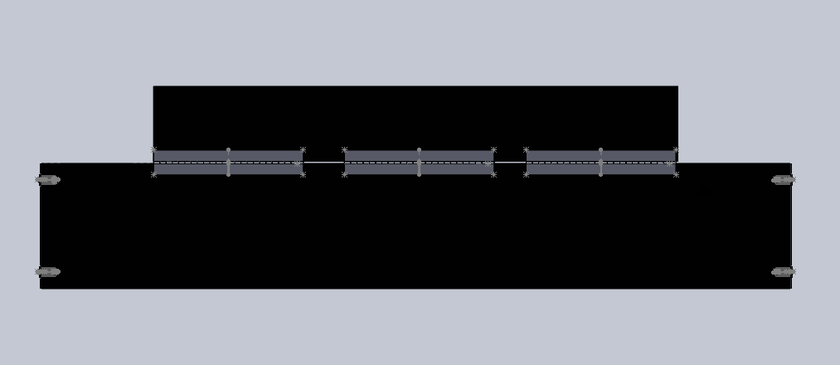
1. Take one 60’’ x 10’’ x 0.125’’ acrylic sheet and cover one side entirely with the matte black car wrap vinyl. This sheet will serve as the back wall of the animal enclosure, and the vinyl-covered side will face inside the animal enclosure.
2. Center and glue the 12’’ acrylic piano hinges to the back of this acrylic sheet (opposite side of the vinyl) using acrylic bonding glue. Piano hinges should be about one inch apart from one another and should approximately cover the middle 42’’ of the arena.
3. Cover one side of the 42’’ x 6’’ x 0.125’’ acrylic sheet with vinyl. This will serve as the lid of the animal enclosure and the vinyl-covered side will face the inside of the animal enclosure.
4. Glue the 42’’ x 6’’ x 0.125’’ to the other leaf of the acrylic piano hinges.
1. Take one 60’’ x 10’’ x 0.125’’ acrylic sheet and cover one side entirely with the matte black car wrap vinyl. This sheet will serve as the back wall of the animal enclosure, and the vinyl-covered side will face inside the animal enclosure.
- Note: Our animals have white fur, and the black vinyl background provides a good contrast to our animal, which helps with processing data. If your animal is not white, use a color that will provide good contrast to your animal (e.g. lime green).
2. Center and glue the 12’’ acrylic piano hinges to the back of this acrylic sheet (opposite side of the vinyl) using acrylic bonding glue. Piano hinges should be about one inch apart from one another and should approximately cover the middle 42’’ of the arena.
3. Cover one side of the 42’’ x 6’’ x 0.125’’ acrylic sheet with vinyl. This will serve as the lid of the animal enclosure and the vinyl-covered side will face the inside of the animal enclosure.
4. Glue the 42’’ x 6’’ x 0.125’’ to the other leaf of the acrylic piano hinges.
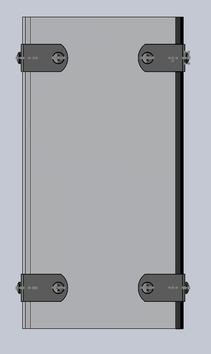
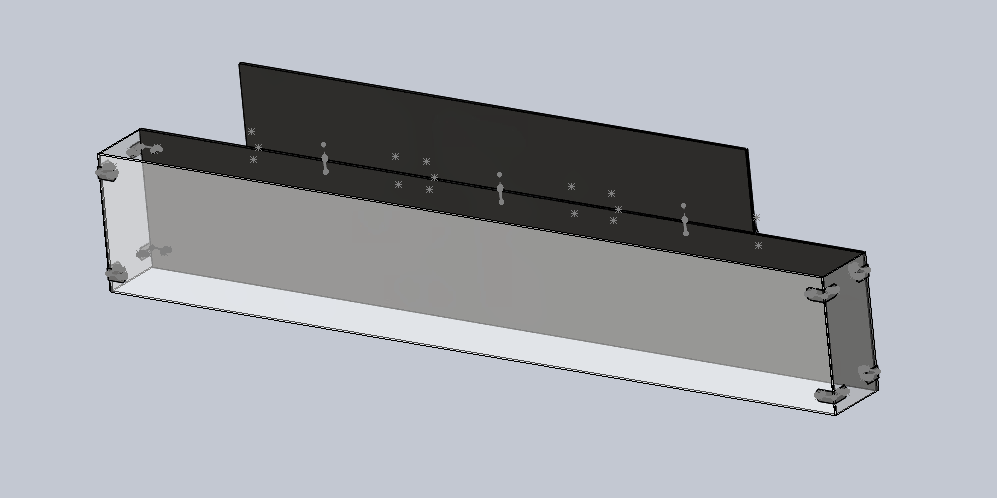
5. Drill four holes into two 60’’ x 10’’ x 0.125’’ acrylic sheets (including the one already covered in black vinyl) and two 5’’ x 10’’ x 0.25’’ acrylic sheets as specified in Drawings 2-3.
6. Assemble the animal enclosure using these acrylic sheets, the zinc-plated steel corner bracket, stainless steel Phillips rounded head screws, and low-strength steel hex nuts.
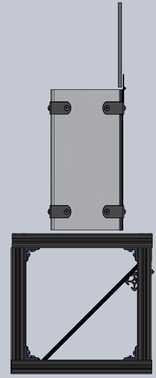
7. Place the animal enclosure on top of the instrumented floor. Make sure the bottom of the animal enclosure is flushed with the floor beneath it.
